Android中如何使用JUnit进行单元测试
作者:网络转载 发布时间:[ 2014/5/19 11:29:43 ] 推荐标签:Android JUnit 单元测试
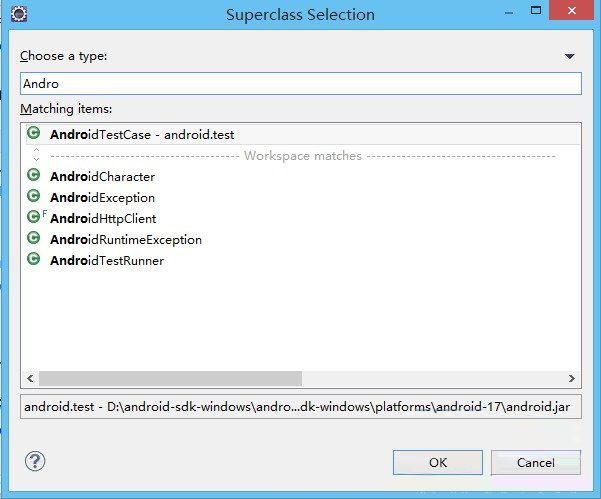
2.新建一个测试测试类并继承AndroidTestCase类,编写测试方法,在测试方法内使用断言assert来测试要测试的方法。
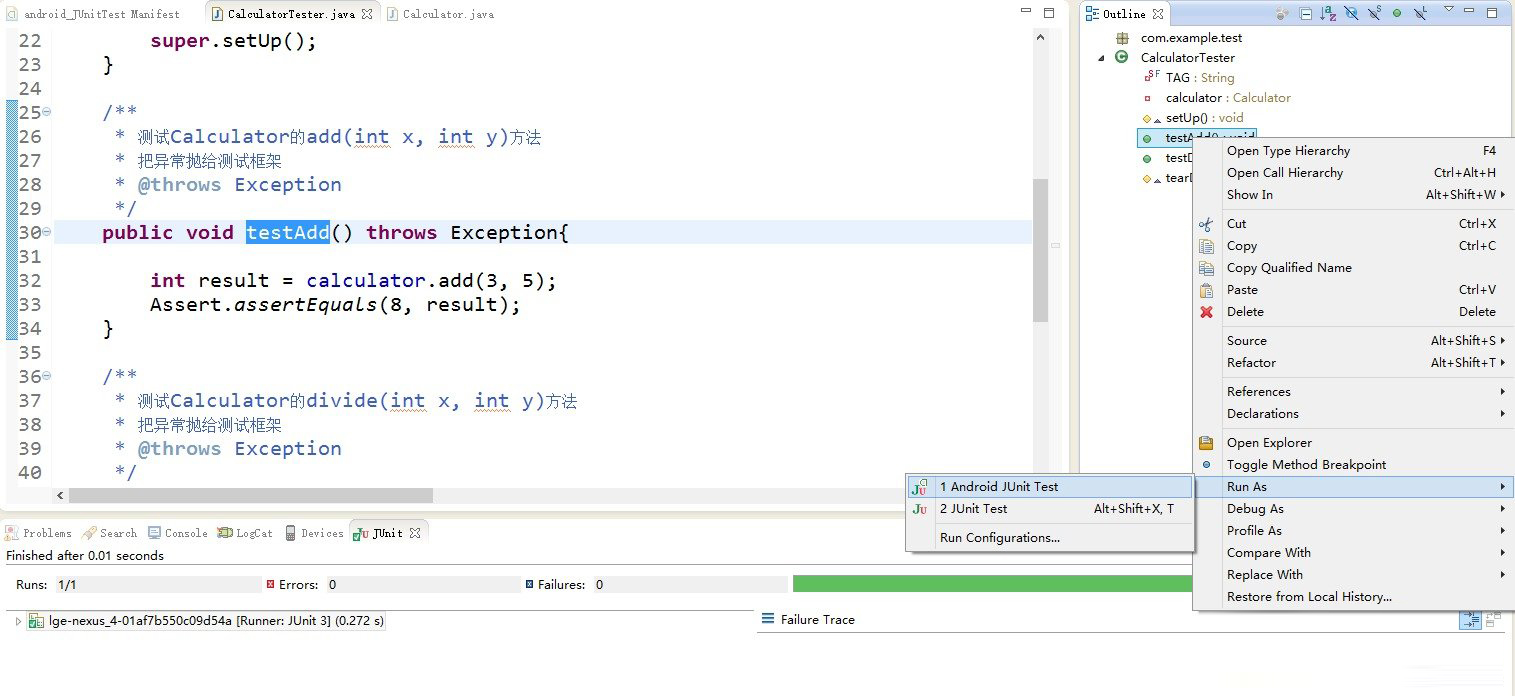
3.点击右面的大纲视图,选择要测试的方法,右键,run as --->Android JUnit test
下面通过一个简单的示例来演示一下如何使用JUnit单元测试
1、先创建简单的待测试类Calculator.java
|
package com.example.junittest;
public class Calculator {
public int add(int x,int y){
return x+y;
}
public int sub(int x,int y){
return x-y;
}
public int divide(int x,int y){
return x/y;
}
public int multiply(int x,int y){
return x*y;
}
}
|
2、创建一个测试类,此类需要继承自AndroidTestCase

示例代码如下:
|
package com.example.test;
import junit.framework.Assert;
import com.example.junittest.Calculator;
import android.test.AndroidTestCase;
import android.util.Log;
public class CalculatorTester extends AndroidTestCase {
private static final String TAG = CalculatorTester.class.getSimpleName();
private Calculator calculator;
/**
* This method is invoked before any of the test methods in the class.
* Use it to set up the environment for the test (the test fixture. You can use setUp() to instantiate a new Intent with the action ACTION_MAIN. You can then use this intent to start the Activity under test.
*/
@Override
protected void setUp() throws Exception {
Log.e(TAG, "setUp");
calculator = new Calculator();
super.setUp();
}
/**
* 测试Calculator的add(int x, int y)方法
* 把异常抛给测试框架
* @throws Exception
*/
public void testAdd() throws Exception{
int result = calculator.add(3, 5);
Assert.assertEquals(8, result);
}
/**
* 测试Calculator的divide(int x, int y)方法
* 把异常抛给测试框架
* @throws Exception
*/
public void testDivide() throws Exception{
int result = calculator.divide(10, 0);
Assert.assertEquals(10, result);
}
/**
* This method is invoked after all the test methods in the class.
* Use it to do garbage collection and to reset the test fixture.
*/
@Override
protected void tearDown() throws Exception {
Log.e(TAG, "tearDown");
calculator = null;
super.tearDown();
}
}
|
一个好的习惯是每个测试方法都抛出异常:throws Exception,然后通过Assert对结果进行断言。
3、通过大纲视图运行测试方法

绿条表示测试通过,在代码中我们测试的时3+5是否等于8,所以结果肯定是通过的,如果我们把assertEquals()中的8改为5的话,会出现以下结果:

红条表示测试没通过,点击右边的错误信息可以定位到出错的代码行。
本文内容不用于商业目的,如涉及知识产权问题,请权利人联系SPASVO小编(021-61079698-8054),我们将立即处理,马上删除。
相关推荐
iOS单元测试mocha、chai、sinon和istanbul实现百分之百的单元测试覆盖率关于单元测试的总结及思考编写更好的Java单元测试的7个技巧Android单元测试框架Robolectric3.0介绍(一)使用Kiwi单元测试总结单元测试如此重要,为什么你不知道Python单元测试??使用装饰器实现测试跳过和预期故障对Controller的单元测试写好单元测试的10个技巧单元测试的重要性Angular单元测试系列??Component、Directive、Pipe 以及ServiceAndroid单元测试的整理提升单元测试体验的利器--Mockito使用总结iOS UnitTest单元测试Vue的单元测试探索(二)

更新发布
功能测试和接口测试的区别
2023/3/23 14:23:39如何写好测试用例文档
2023/3/22 16:17:39常用的选择回归测试的方式有哪些?
2022/6/14 16:14:27测试流程中需要重点把关几个过程?
2021/10/18 15:37:44性能测试的七种方法
2021/9/17 15:19:29全链路压测优化思路
2021/9/14 15:42:25性能测试流程浅谈
2021/5/28 17:25:47常见的APP性能测试指标
2021/5/8 17:01:11热门文章
常见的移动App Bug??崩溃的测试用例设计如何用Jmeter做压力测试QC使用说明APP压力测试入门教程移动app测试中的主要问题jenkins+testng+ant+webdriver持续集成测试使用JMeter进行HTTP负载测试Selenium 2.0 WebDriver 使用指南


 sales@spasvo.com