TestNG 的示例代码
TestNG 提供了从命令行运行测试用例的方法。下面将首先从命令行运行测试用例。假设有如下的测试用例组:
列表 1. TestNG 示例代码
package example1;
import org.testng.annotations.*;
public class SimpleTest {
@Configuration(beforeTestClass = true)
public void setUp() {
// code that will be invoked when this test is instantiated
}
@Test(groups = { "HelloWorld" })
public void helloWorldTest() {
System.out.println("Hello World");
throw new Error();
}
@Test(threadPoolSize = 10, invocationCount = 5,
timeOut = 1000, groups = { "multiple" })
public void multiThreadTest() {
System.out.println("MultiThread test");
}
@Test(groups = { "HelloNature" })
public void helloNatureTest() {
System.out.println("Hello Nature");
throw new Error();
}
}
运行 TestNG 的 Ant 脚本
为了运行这组测试用例,构建了如下的 Ant 运行脚本:
列表 2. 运行测试用例组的 Ant 脚本 build.xml 文件
<project default="test">
<path id="cp">
<pathelement location=
"c:/spark/eclipse/plugins/org.testng.eclipse_4.7.0.0/lib/testng-jdk15.jar"/>
<pathelement location="c:"/>
</path>
<taskdef name="testng" classpathref="cp"
classname="org.testng.TestNGAntTask" />
<target name="test">
<testng classpathref="cp" groups="HelloWorld, HelloNature">
<classfileset dir="./" includes="example1/*.class"/>
</testng>
</target>
</project>
运行之后的结果如下:
图 1. 命令行运行 TestNG 的结果

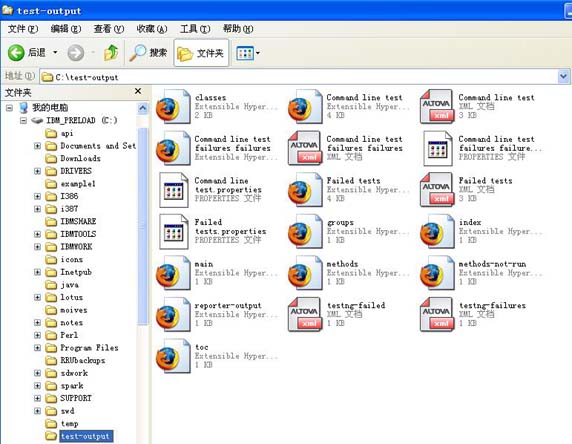
运行完成之后,会在运行目录下生成一个 test-output 目录。如图 2 所示:
图 2. 生成的 test-output 目录

该目录中包含有 html 形式的运行结果的报告,通过命令 start test-outputindex.html 可以查看生成的测试报告。